How to Draw a Sprinkler Plan Before You Break Ground
Building a plan that holds together: scale drawing of the yard, zones grouped by planting type, tracing the pipe network, and getting the work sequence right before the first trench opens.

Good heads alone don't make a good system
In a sprinkler system that works well, heads, zones and pipe runs are planned together. You can buy excellent heads and still end up with a mediocre system if nobody looked at the whole yard before the shovel came out. This article covers the scale drawing and work sequence; for the mistakes checklist see Irrigation Design Mistakes: A Pre-Installation Checklist to Avoid Dry Spots and Soggy Zones.
Many of the problems homeowners run into (patchy lawn, dry strips, a zone with more heads than the supply can feed) trace back to choices made without looking at the whole yard.
Step 1: Know the constraints you're starting with
It all starts at the meter. Two concrete measurements: pressure at an outdoor hose bib with a gauge on a tee, first with the outlet closed (static) and then with water flowing (dynamic, the one you design on), and available flow measured with a bucket (5 gallons, timed).
These two numbers define what's possible in the yard. Head selection, number of zones and pipe sizing all have to fit inside them. Typical US residential numbers are often 40-70 psi static and 10-20 gpm on a 3/4-inch or 1-inch meter, but only your own measurement counts. Full method: How to measure water pressure for irrigation.
The same numbers set how big each zone can be, and so how many zones you need, even though the controller only opens one valve at a time. Each zone should stay under about 80% of the measured flow: with 15 gpm available a zone can draw about 12 gpm, so turf heads that need 20 gpm together go on two zones. A yard with many planting types and modest flow usually ends up with more, smaller zones, even if that means an extra valve and a busier manifold box.

Step 2: Map the yard to scale
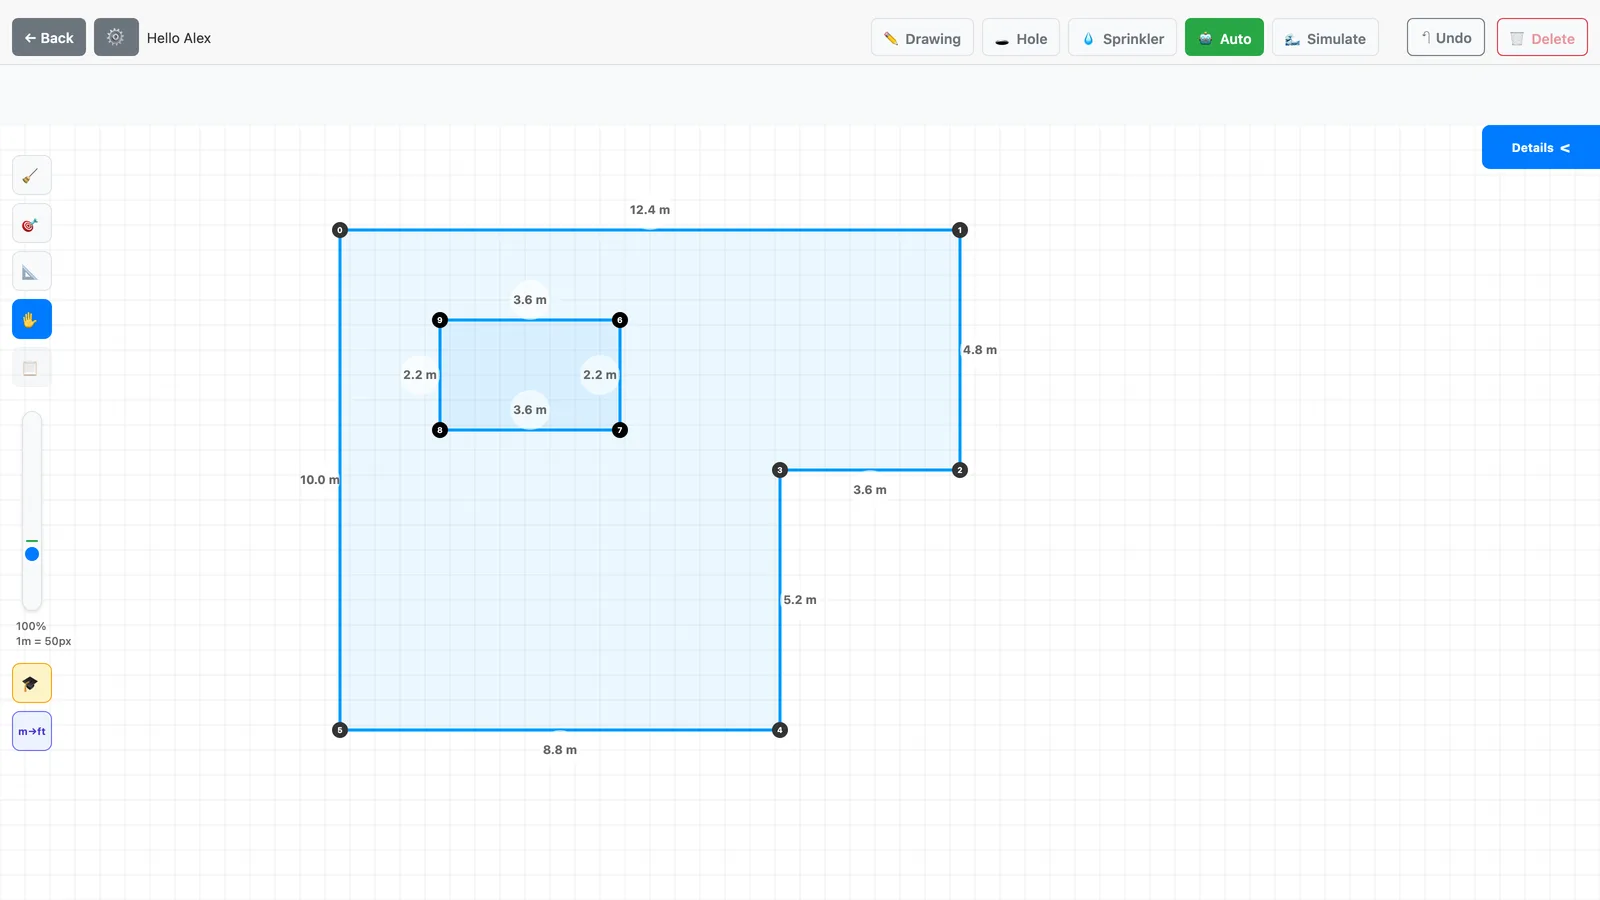
On paper or on screen, draw the yard to scale. Mark the property lines, the house, walkways, patios, edging, the turf areas, planting beds, hedges, trees, permanent obstacles, and any meaningful grade changes (every 10 feet of elevation gain costs roughly 4-4.5 psi).
Without a scaled plan, every decision after this point is a guess. With one, you can check those decisions and measure the real distance between two points on the drawing instead of pacing it off in the yard and rounding to a nice number.
At this stage, also mark what's underground, not just what's visible on the surface. A tree with shallow roots you can't cut through, a gas or electrical line running along one side of the yard, a foundation that extends past the wall of the house. Anyone who only draws what's visible above ground risks getting the trench stuck halfway through the job, with pipe already laid on one side and no clean way to continue on the other without routing around it.
Step 3: Zone by planting type, not by convenience
A zone groups plantings with matching water needs. Every other choice in the design depends on it. Turf → its own zone, rotors or sprays depending on area. Shrub beds and hedges → their own zone, drip or micro-spray. Vegetable garden → its own zone, drip. Containers and pots → their own zone, dedicated micro-irrigation.
Mixing turf and shrub beds on the same zone is a common design mistake. Precipitation rates (in/hr) don't match: turf needs a lot of water in a short window, beds need a little water over a longer one. No controller programming reconciles that on a shared zone. See also: Hydrozones: split your garden to irrigate better.
Step 4: Pick heads that match each zone
For each zone, pick the head type that fits. For turf the short side decides, not the area: strips and lawns up to about 15 feet wide → pop-up spray heads (4-15 ft radius); wider lawns → rotors (15-40 ft radius). Straight-line beds → pressure-compensating drip emitters every 12-18 inches. Standalone trees → 2-4 emitters per tree, spaced around the root zone.
The classic trap: picking a head off the catalog spec sheet without checking whether its nominal radius holds up at the pressure you measured. Radius drops as pressure drops, so read the nozzle chart at the pressure you measured, not at the top of the range. See the head-to-head coverage principle: Sprinkler Head Spacing: The One Decision That Decides Whether Your Lawn Goes Brown.
Step 5: Check that pressure and flow add up
The plan needs to be validated on two axes. Flow per zone: the sum of the rated flow of every head on a zone has to stay under about 80% of the measured flow. Pressure per zone: the pressure at the farthest head on that zone has to stay inside its rated operating range (for many residential rotors roughly 30-65 psi; the datasheet gives the exact range).
If a zone blows past either limit, split it into two zones and add a valve. Better to find that out on paper than after the pipe is in the ground.
Step 6: Trace the pipe network and order the work
Once the zones are validated, trace the pipe runs. 1-inch mainline out to the valve manifold. Zone laterals sized to the flow they carry: to keep water speed under about 5 ft/s, 3/4-inch Schedule 40 PVC handles up to about 8 gpm and 1-inch up to about 13. 1/2-inch swing pipe only for the last foot or two to each head.
Work sequence matters as much as the drawing: dig and lay the mainline and valve box first, then run the zone laterals following the plan, and only then set the heads on the risers that are already in place. Anyone who reverses that order, setting heads first and then trying to route pipe to them, almost always ends up detouring a run that was straight on paper.
What a design tool gives you
Everything above is doable on graph paper. But past the fourth zone, the recalculations get tedious, and checking coverage visually gets hard to do by hand on a busy drawing.
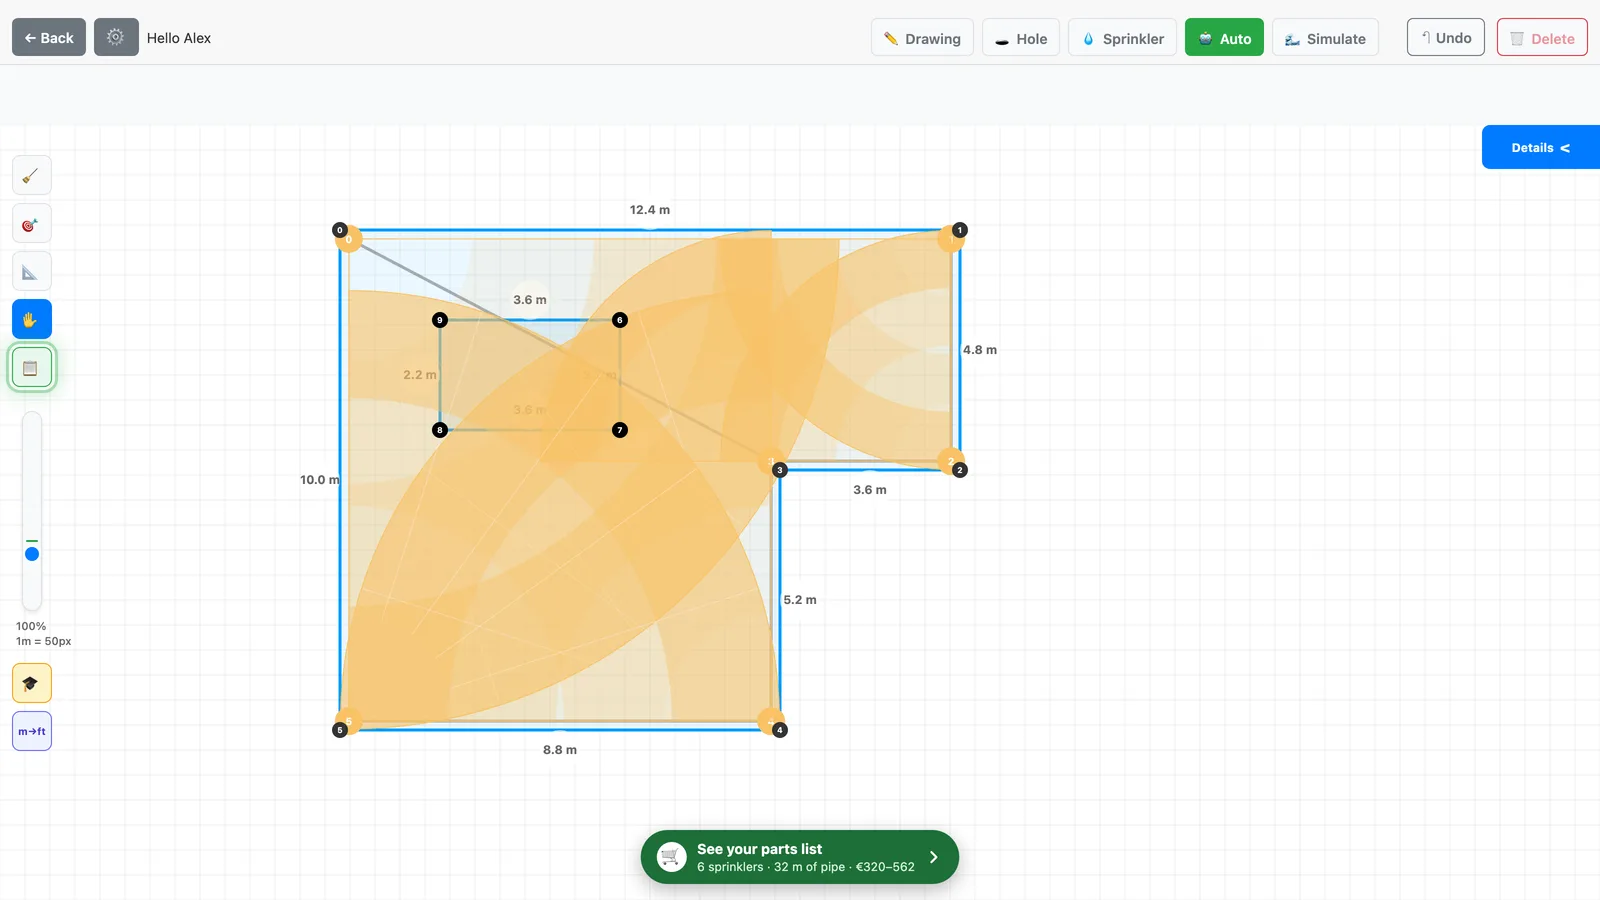
In SprinklerMap you sketch the yard to scale, place the heads and see the throw radii as circles, so gaps and overwatered overlap show up immediately. The design stays yours: the tool shows you early what you would otherwise discover in the first summer.
A checklist before the first trench
Before the shovel comes out, go through this list on paper, one item at a time: pressure and flow measured on site, not guessed from memory. Every zone grouped by matching water need, exposure included. The sum of rated head flow on each zone under available flow, safety margin included. Head-to-head coverage checked against the real measured radius, not the catalog number. Pipe diameter sized run by run against local flow, not the same size end to end. The pipe route checked against what's underground: roots, cable, gas line.
If any of those items can't be backed by an actual number, the plan isn't ready for a shovel yet.
Bottom line
A system that holds together gets built in this order: real measured pressure and flow, a scaled drawing, zones grouped by matching water need, heads sized to each zone, a pressure/flow check, and a pipe route with the work sequence set correctly.
Each step checks the one before it, so a step skipped on paper tends to turn up later as a dry or soggy patch.
Before you buy parts, have the plan checked by someone with experience: what numbers to prepare, where to ask and how to share it so they can edit it is in How to Get Your Sprinkler System Design Reviewed Before You Buy Parts.
Recommended products
These product links are affiliate links: if you buy on Amazon through them it costs you nothing extra, but it helps us keep SprinklerMap alive as a project and create new useful content.
| Product | Description | Price (€) | Buy |
|---|---|---|---|
| Glycerin-filled pressure gauge 0-160 psi with hose thread | Glycerin-filled gauge, 0-160 psi range, with a 3/4" garden hose thread fitting. Steady reading with no needle flutter, the starting measurement before any plan gets drawn. | ~€10-20 | Amazon |
| Engineering graph pad, 11x17, for scale drawings | 11x17 grid graph pad, 50 sheets, sized for sketching the yard to scale before transferring the layout to a digital planning tool. | ~€10-18 | Amazon |
| Irrigation valve kit 3/4" (3-pack) | 3-pack of 3/4-inch 24V solenoid valves for splitting the yard into zones per the plan, with turf, beds and vegetable garden each on their own valve. | ~€30-55 | Amazon |
| Laser distance measure for outdoor layout | Laser measure rated to 130+ feet for taking real yard measurements before sketching a scaled plan, far faster and more accurate than a tape measure over long runs. | ~€30-60 | Amazon |
Technical note: The pressure, flow, coverage radius and cost figures in this article are estimates based on standard conditions (36 psi, flat ground, short pipe runs). Your actual numbers depend on the static and dynamic pressure at your house, your meter's flow rate, friction loss in the piping, and the specs of the heads you buy. For anything beyond a small yard, or if your setup looks unusual, it's worth checking with a licensed irrigation contractor or running the numbers against your own measurements.