How to map irrigation zones in your garden
Step-by-step guide to dividing your garden into irrigation zones: how to measure areas, choose the right sprinkler type for each zone and create the final map.

Why map before you install
Designing without a map is the fastest way to build an inefficient system. Without knowing exactly where each sprinkler goes, you end up with overlapping zones where they are not needed and uncovered areas you must water by hand. The map is the reference document for trenching, laying, programming and future maintenance.
A good map accounts for three variables: garden geometry (shape and dimensions), hydrozones (groups with similar water needs, see Hydrozones: split your garden to irrigate better) and physical constraints (paths, walls, trees). These three layers combined determine where every sprinkler sits and how zones are divided.
How to measure your garden
A laser measure is the fastest tool: you can survey a 500 m² garden in 10 minutes with millimetre precision. Start with the perimeter, then measure internal distances between fixed elements. Sketch it on paper in rough scale.
For irregular shapes, break the area into rectangles and triangles. Sum the simple areas for the total. A 10% measurement error is acceptable at design stage, because you can correct it by adjusting sprinkler radii during installation.

Dividing by hydrozone
Group areas by similar water need. Lawn: the highest demand. Shrubs and hedges: medium demand. Flower beds: often drip-irrigated. Mature trees: deep, infrequent watering.
Keep lawn and shrubs on separate zones: in SprinklerMap's calculation a full-sun lawn needs about 5 mm a day and shrubs about 3, so a shared schedule either overwaters the shrubs or leaves the lawn short. This rule decides how many solenoid valves you need (see Hydrozones: split your garden to irrigate better).
Choosing the sprinkler type per zone
Lawn up to 6 m wide: popup sprays with 180° or 90° nozzles. Lawn 6–15 m wide: popup rotors. Narrow beds along a wall: spray with strip nozzle (1.2 m wide). Vegetable garden and flower beds: drip or micro-jets. For the spray vs drip comparison see Sprinklers or drip? How to choose zone by zone, and how to add drip to an existing sprinkler system.
Adjacent heads should be no farther apart than their radius, so that each throw reaches the next head: two spray heads with a 3 m radius go no more than 3 m apart. This head-to-head principle gives uniform watering (details at Sprinkler Head Spacing: The One Decision That Decides Whether Your Lawn Goes Brown).
Creating the digital map with SprinklerMap
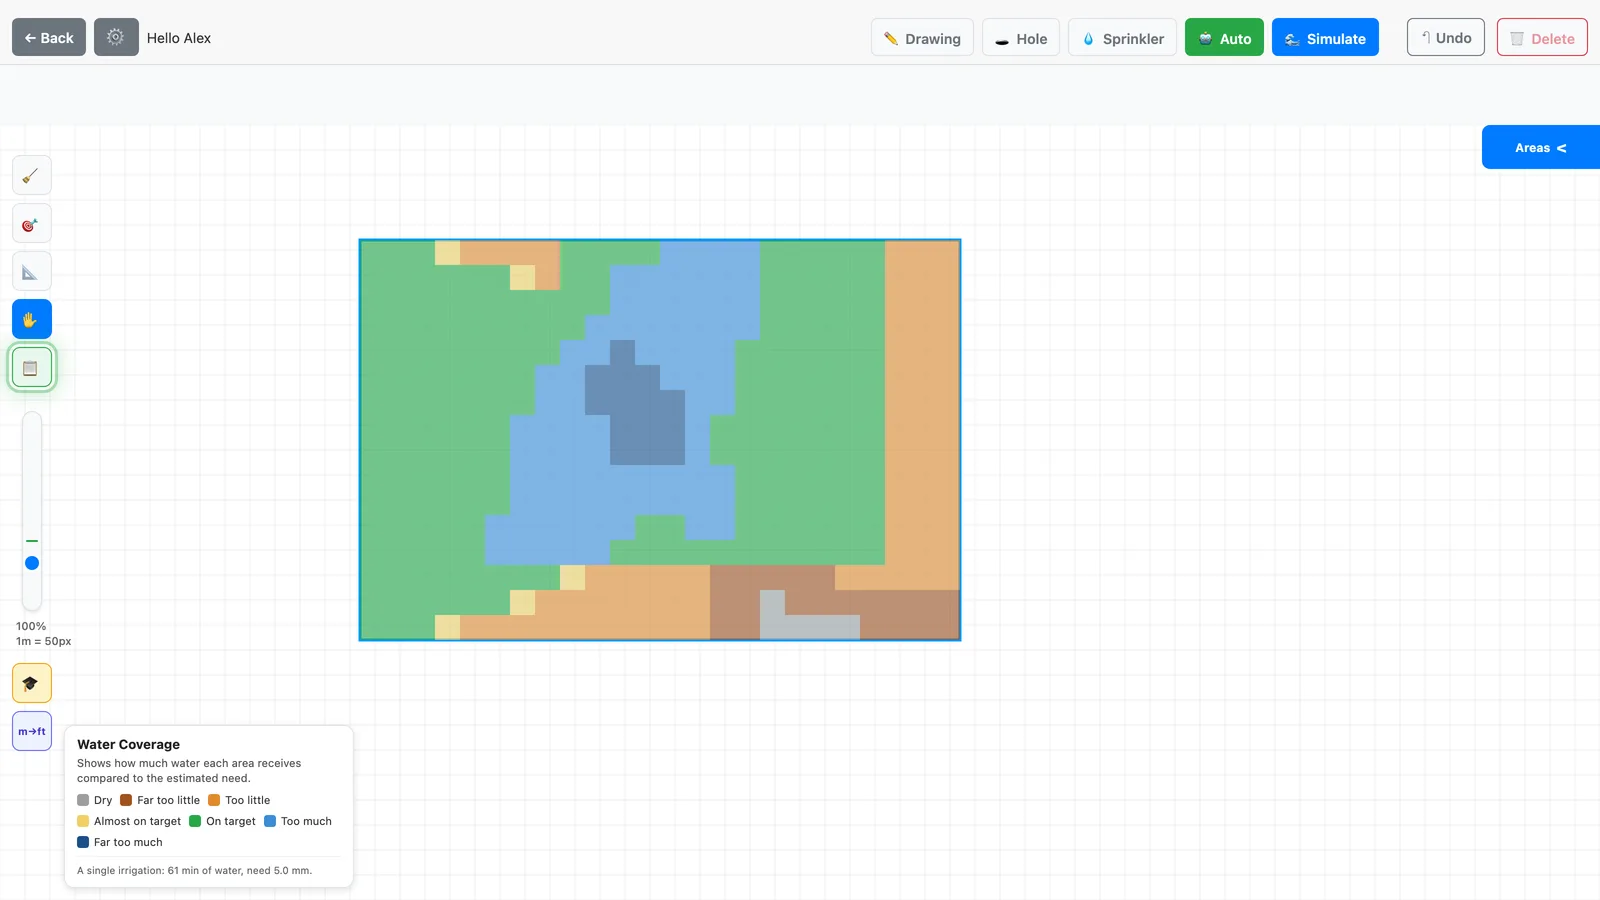
Transfer your measurements into SprinklerMap: draw the garden perimeter, place sprinklers on the map and see coverage of every head in real time. Mark paths and other areas that must stay dry as excluded areas.
The advantage over paper is recalculability: move a sprinkler and coverage updates instantly. Print the map, or save it as a PDF from the print dialog, and your installer gets the exact positions.
If you want to weigh other free options against SprinklerMap, the comparison of automatic placement, satellite mapping and materials lists for each is at 7 Best Free Irrigation Design Software Tools (2026).
Common mapping mistakes
The most common mistake is ignoring slope: in a sloped garden, downhill sprinklers on the same zone receive more pressure, and therefore more water, than uphill ones. Mark any slope above 5% on the map with an arrow showing the downhill direction. At installation, these sections usually need shorter zones or anti-drain valves to stop residual water dribbling out of the lowest heads after shutoff.
A second common mistake is forgetting transition strips: the band of lawn next to a hedge or bed. These edges have mixed needs: partial shade from nearby vegetation, but still lawn underneath. If the strip is narrow (under 1 m), fold it into the adjacent lawn zone. If it is 2–3 m wide, draw it as its own micro-zone with 180° nozzles aimed back at the lawn.
Legend and symbols
A map that stays useful years later, for an extension, a repair or a change of ownership, needs an explicit legend as well as intuitive colours. Minimum convention: filled circle for spray heads, circle with an arrow for rotors, square for drip emitters or driplines, triangle for solenoid valves, rectangle for the controller. Label each symbol with its zone number and, if known, the sprinkler model.
Always add a north arrow and a graphic scale bar, not just the numeric ratio: if the map is printed or photocopied at a different size, the graphic bar stays accurate while the numeric ratio does not. Save the map both as a PDF and as an editable file: sooner or later someone (possibly you) will need to update it.
Sharing the map with your installer
A complete map includes: position of every sprinkler with the chosen model, main pipe routing with diameter, solenoid valve and controller location, distances from fixed reference points.
An installer who receives a detailed map can accurately quote materials and labour, avoiding change orders mid-project. For full independent design guidance see also How to design irrigation for a rectangular garden.
How many sprinklers per zone: a quick calculation
Once you have the map and have chosen the sprinkler type for each zone, you need to confirm each zone stays within the available flow budget. The rule: total flow of all active sprinklers in one zone must not exceed 80% of your tap's maximum flow (measure this with a flow gauge).
Example: the tap delivers 18 L/min, so the budget per zone is 80% of that, 14.4 L/min. A spray head with a Rain Bird MPR 15 nozzle (about 4.5 m radius) at 2 bar uses about 3.4 L/min as a quarter circle and 6.8 L/min as a half circle: 14.4 ÷ 3.4 gives 4 quarter-circle heads per zone. A Rain Bird 5004 rotor with the standard 1.5 nozzle at 2.5 bar uses about 5.4 L/min whatever its arc, so 2 rotors per zone. The 20% you leave out is the reserve, because real flows drift from datasheet figures.
Key takeaways
Map first, dig second. A complete garden map prevents the two most costly irrigation mistakes: dry patches from inadequate coverage and over-watering from mixing hydrozones. Measure the garden with a laser measure, divide into hydrozones (lawn, shrubs, drip), choose the sprinkler type for each zone, verify each zone's flow budget, then transfer to SprinklerMap for coverage visualisation before you buy a single component.
Frequently asked questions
How precise does the garden measurement need to be?
±10% is acceptable at design stage, because on most spray heads the radius screw can shorten the throw by up to about a quarter without changing nozzles. What matters most is getting the rough shape right so you can position heads at the correct grid spacing.
Can I design an irrigation system for an irregular-shaped garden?
Yes. Break the irregular shape into overlapping zones of simple geometry: rectangles, L-shapes, triangles. Each zone can have its own sprinkler grid, and adjacent zones can share coverage at the boundaries. SprinklerMap handles freeform garden shapes and shows any uncovered areas in real time.
How do I handle a garden with different elevations?
Sloped areas need rotors rather than spray heads (rotors apply water more slowly, reducing run-off). Each slope should be a separate zone from the flat lawn: water runs off a slope sooner, so it needs shorter cycles with soak pauses, and on a shared zone one of the two ends up over- or under-watered.
Recommended products
These product links are affiliate links: if you buy on Amazon or AliExpress through them it costs you nothing extra, but it helps us keep SprinklerMap alive as a project and create new useful content.
These products are catalogued in our brand database, with the same description and price range you find on the manufacturer page.

| Model | Type | Description | Radius (m) | Price (€) | Buy |
|---|---|---|---|---|---|
| 🖥️ X-Core (4-8 zone) | Controller | Outdoor controller with weatherproof enclosure, 4-8 zones, 3 independent programs. The industry standard for residential installations. | — | €90-210 | Amazon |
Other suggested products
Products not in the brand catalogue: generic material, tools and accessories where the right size matters more than the brand.
| Product | Description | Price (€) | Buy |
|---|---|---|---|
| Bosch laser measure with Bluetooth | Pocket laser measure with dedicated app. Range up to 30 m, ±2 mm accuracy. Ideal for surveying garden areas in minutes. | ~€45-70 | Amazon |
| Sprinkler marking flags (100 pcs) | Coloured steel flags for marking sprinkler positions during survey and installation. | ~€8-15 | Amazon |
| Garden area marking stakes with rope | Durable plastic stakes with rope for marking and measuring garden zones before installation. | ~€10-18 | Amazon |
| Product | Description | Price (€) | Buy |
|---|---|---|---|
| Pocket laser distance meter 40 m | Budget laser distance meter with LCD display. Range 0.05–40 m, ±2 mm accuracy. Perfect for measuring garden areas before designing your irrigation system. | ~€15-30 | AliExpress |
| Coloured garden marking flags (200 pcs) | Plastic and wire marking flags for recording sprinkler positions, pipe routes and zones during survey and installation. Pack of 200 in 4 colours. | ~€6-12 | AliExpress |
Technical note: The pressure, flow, coverage radius and cost figures in this article are indicative and calculated under standard conditions (2.5 bar, flat ground, short pipe runs). The actual outcome depends on the pressure available in your system, your meter's flow rate, head loss along the pipes and the specifications of the sprinklers you choose. For larger installations or complex situations, it's worth checking with a qualified technician or running the numbers on your own garden's real data.